


👋 Hi everyone! Karla here from the Technical Support Engineering team. Today, we’re diving into how to use Custom Actions and Custom Objects to reference People data — the kind of data that sticks with your users across multiple conversations.
We’ll walk through setting up a Prescription Tracker workflow — a simple example that shows how to store and display data for each user inside Intercom Messenger. Let’s start with the why.
Imagine you’re tracking prescriptions for your customers. If a user chats today about Tylenol, you’d want that stored on their profile. Then, if they return next week about Ibuprofen, that data should build on top of their record — not replace it.
That’s what People data does: it acts like a long-term memory for your users.
Each conversation can reference one item (the chat about Tylenol, for example), but the People record holds the full history of every prescription that’s ever been added for that user.
Let’s start by checking out what my test API returns when I call the /prescriptions endpoint 👇
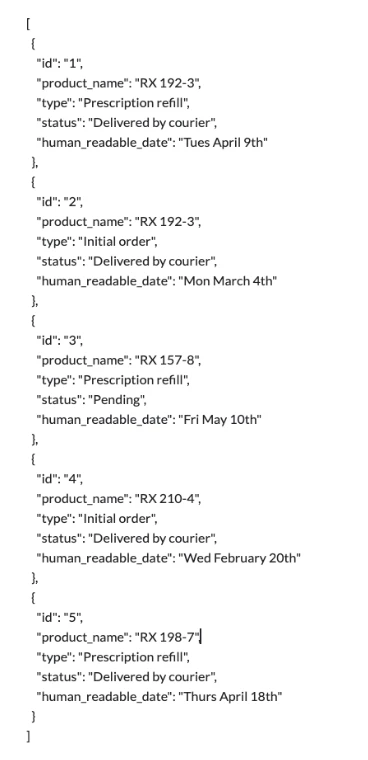
This is key, because the structure of your API’s request and response will shape how you set up your Data connector.
⚙️Next, we will create your The Data Connector connects Intercom to your external system — in this case, your prescriptions API.
Go to Settings → Integrations → Data Connector

Click New data connector

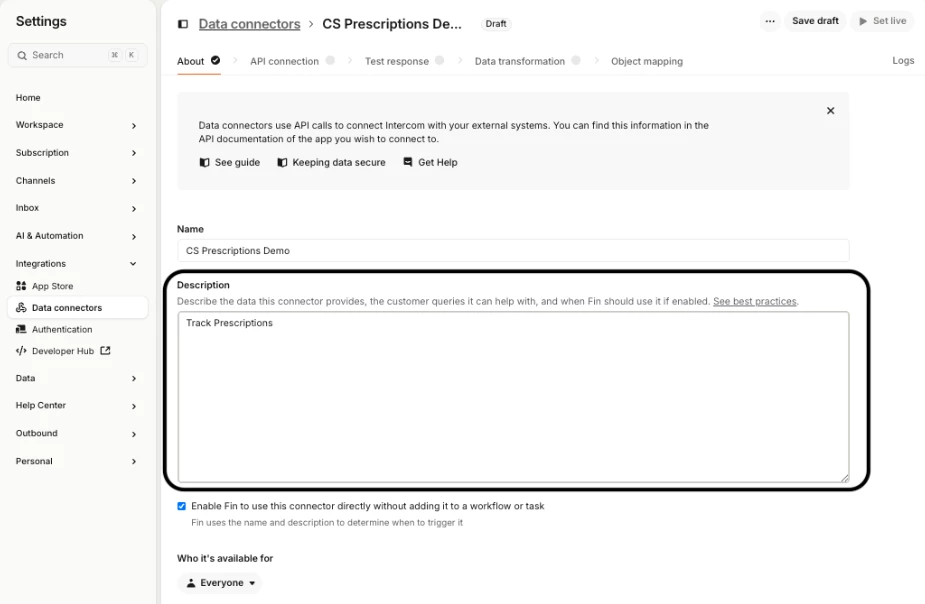
Name it something like CS Prescriptions Demo

Add a description ✍️
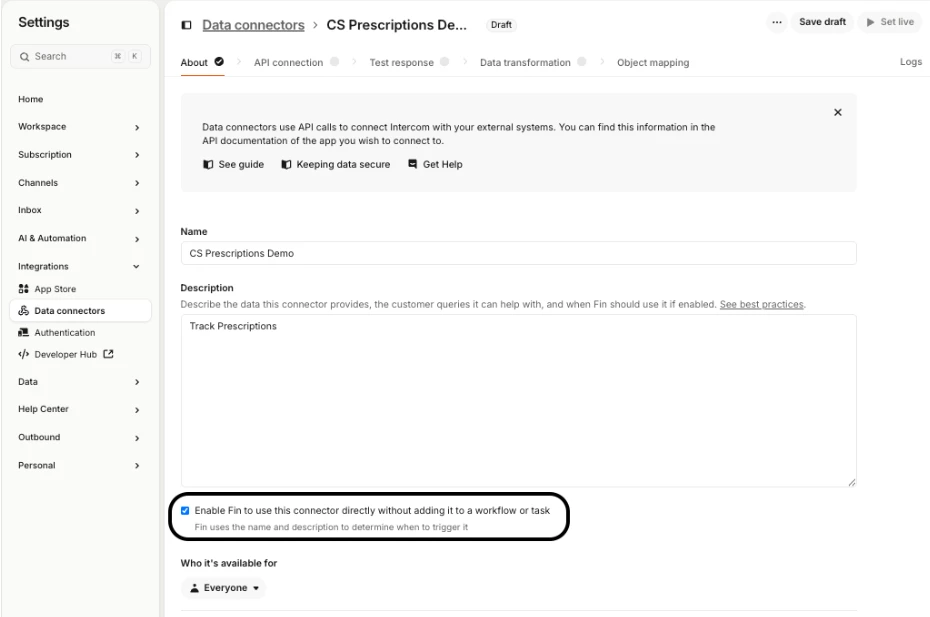
Enable Fin to use this connector directly without adding it to a workflow or task ☑️
Choose the GET method and paste your endpoint, e.g. https://your-api-url/prescription

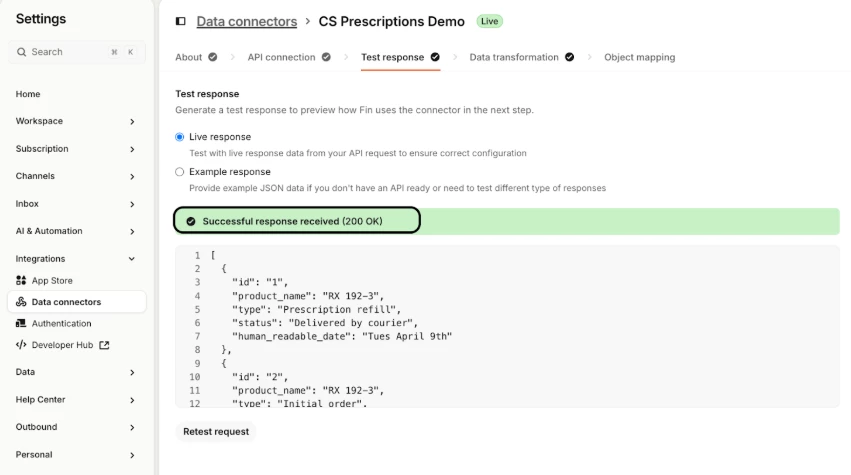
Moving on to the next step. In Test Response, you want to make sure you select Live Response 👇
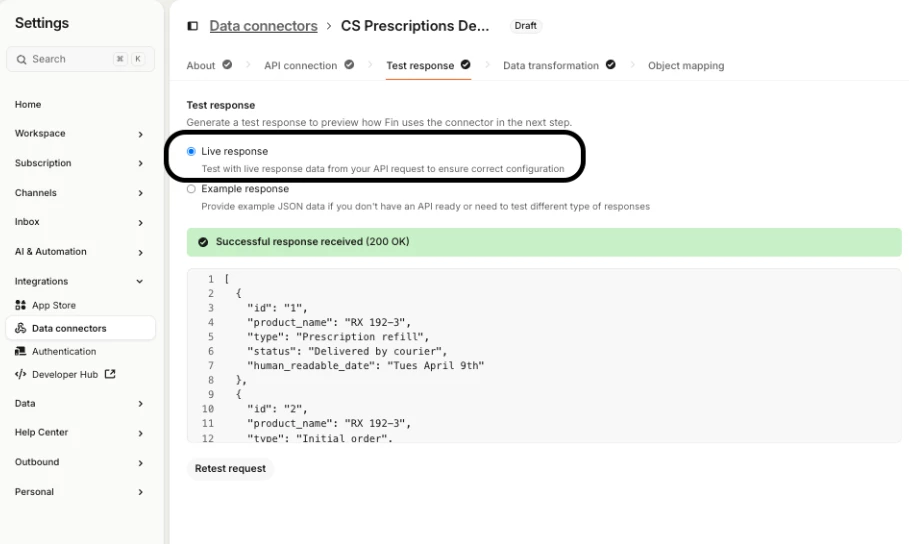
Next, select Test or Retest request to make sure the API returns data successfully
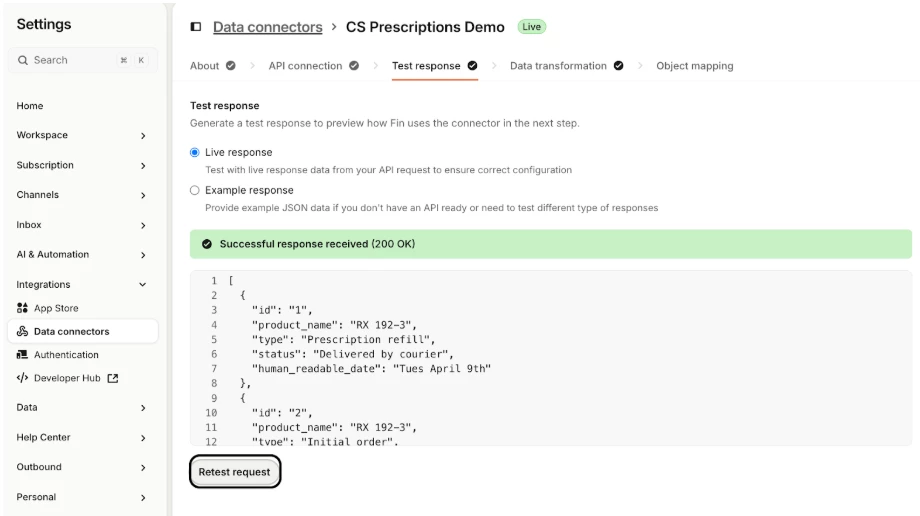
We get a 200 OK response with the data from the API, looks like we’re ready to go! 👏🏼
Once you click the Next step button, it will take you to Data transformation.
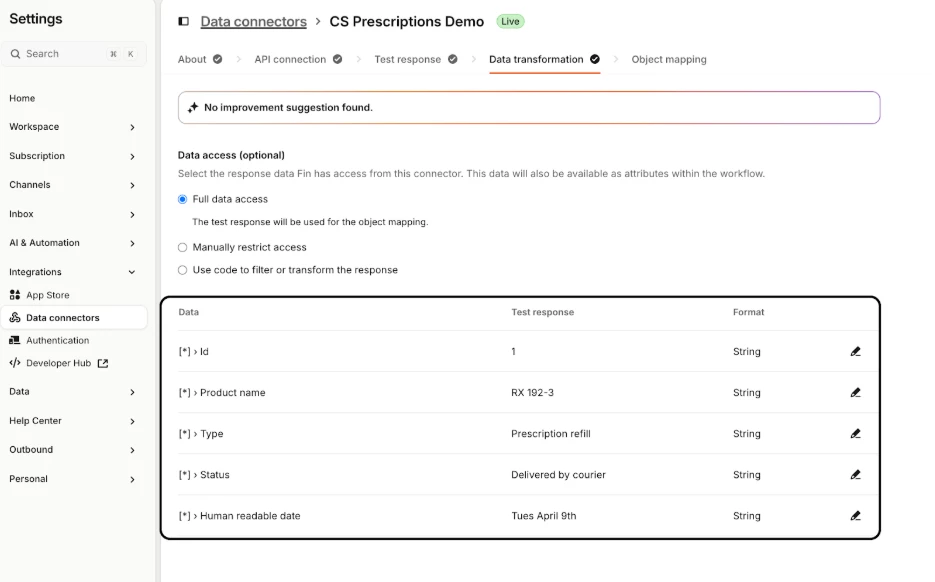
The Data Transformation section lets you reshape and clean your API data before it’s stored in Intercom. This step is super helpful when creating Custom Object attributes, since it ensures your data is formatted correctly and maps smoothly to each field.
Click the Next step button again. This brings you to the Object mapping section.
This step is technically optional, but it’s really important if you plan to use your data in Workflows, especially for GET requests.
Object mapping tells Intercom where to store the information that comes back from your API, so your Workflow can use it to answer customer questions automatically.
Now let’s map the response data to a Custom Object, but first, what exactly is that?
Custom Objects let you extend Intercom’s standard People and Conversation data so you can store information that reflects your business more accurately and flexibly. They’re perfect for tracking things like orders, prescriptions, or subscriptions, anything unique to your use case.
The first step here is to save your Data Connector, and then go ahead and create your Custom Object to hold that data.
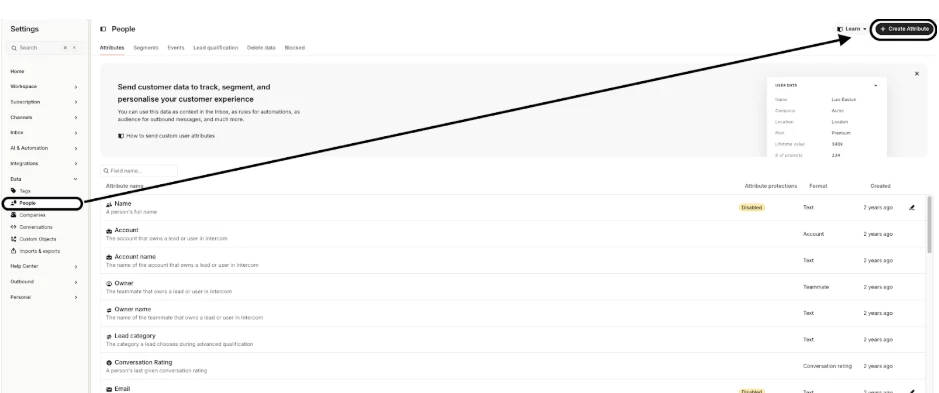
To get started, go to Settings > workspace data > Custom object data.
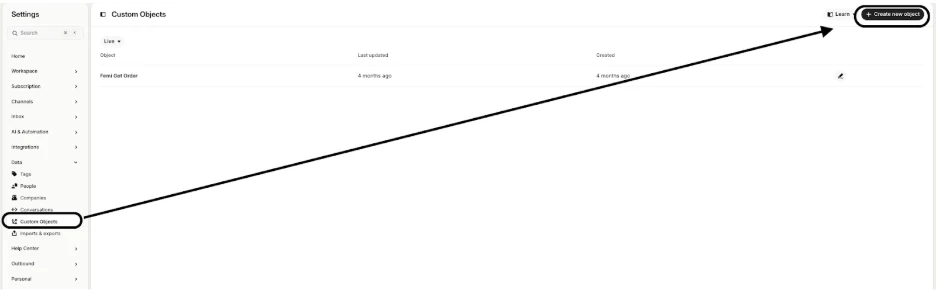
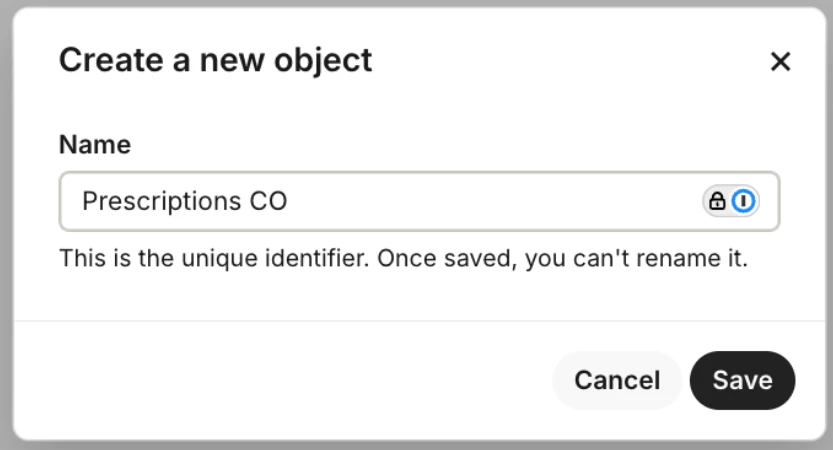
Create your first Custom Object by clicking on “Create new object”. Give the object a name (e.g. Prescriptions CO to represent Prescription Custom Object) and then click “Save”.
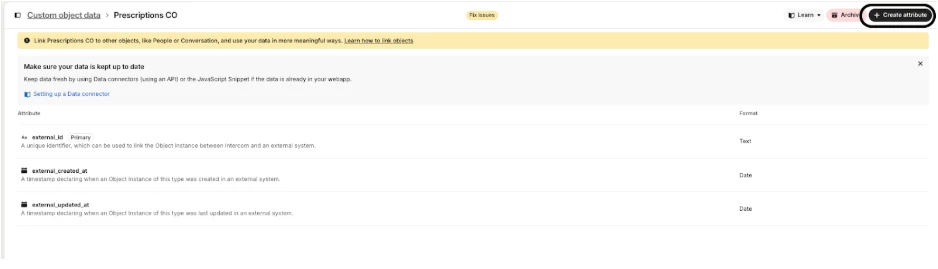
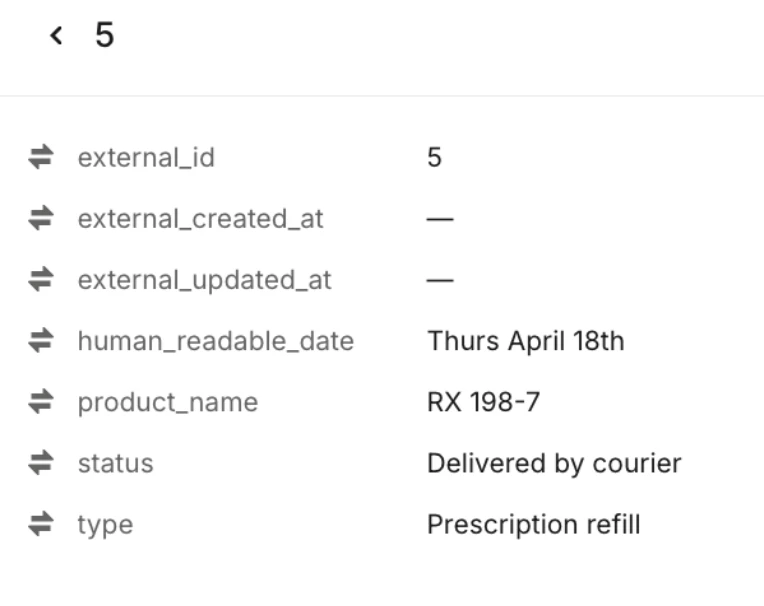
This creates a new parent object with some recommended default attributes that track some data that are important when using Custom Actions:
- ‘external_id’
- ‘external_created_at’
- ‘external_updated_at’
Once done, we can create attributes that match up to the response of the API. I’ll not include ID since the external_id comes as a default attribute.
Next we add all of our attributes and map them to the response that correlates, then include a reference to People which will allow us to create connections between our Custom Object and the People to power the workflow 👇
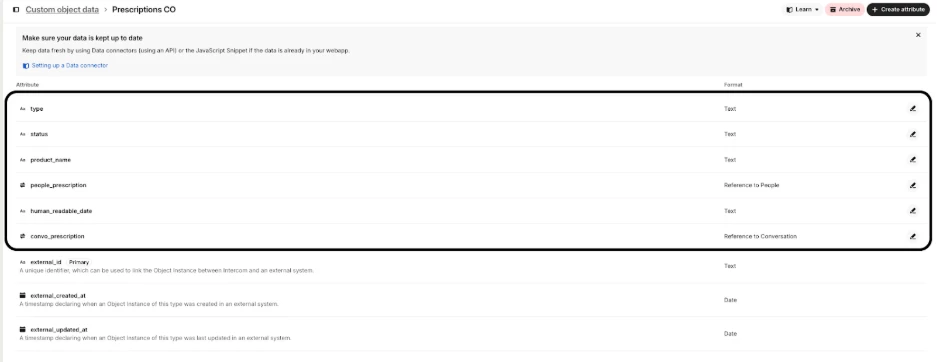
For convo_prescription, you want to make sure Allow referencing multiple Conversations is toggled off

For people_conversation, we’ll create a reference that allows a person to have multiple prescriptions. We talk about this in our article on Setting up references with Custom Objects.
You want to make sure Allow referencing multiple people is toggled on 👇
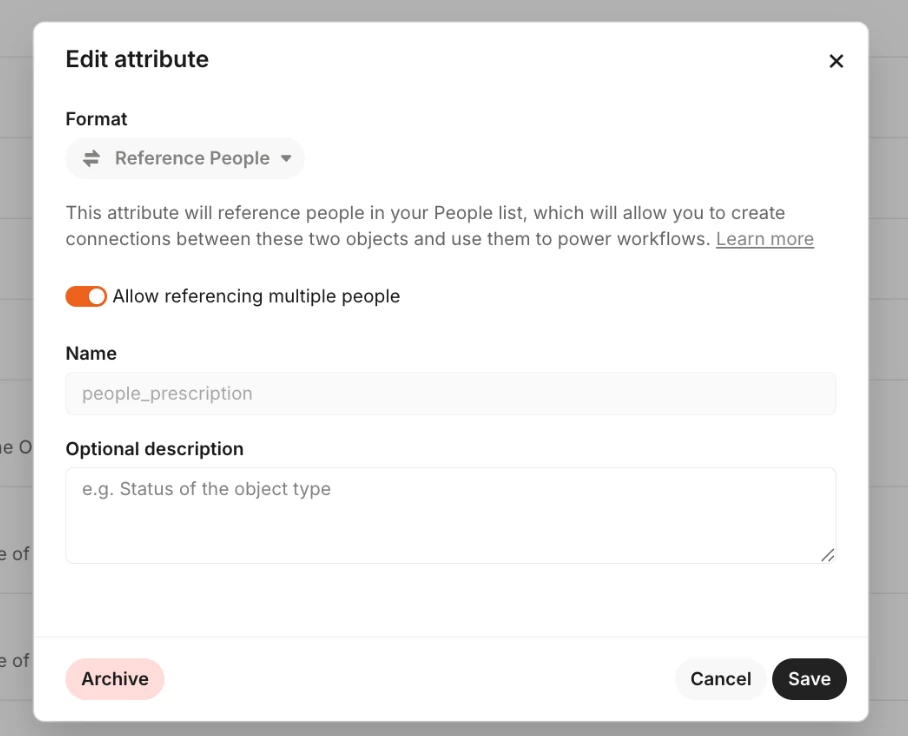
This setup means one person can have multiple prescriptions stored — perfect for tracking ongoing data that grows over time.
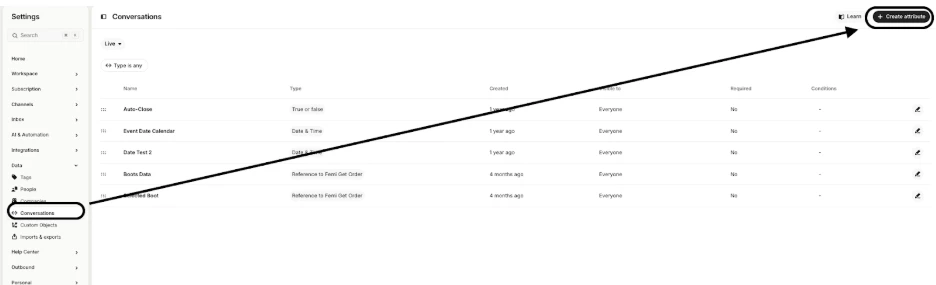
What we’ll do next is create a conversation attribute where we want to store the prescriptions we’re showing them and the one the customer chooses to chat about.
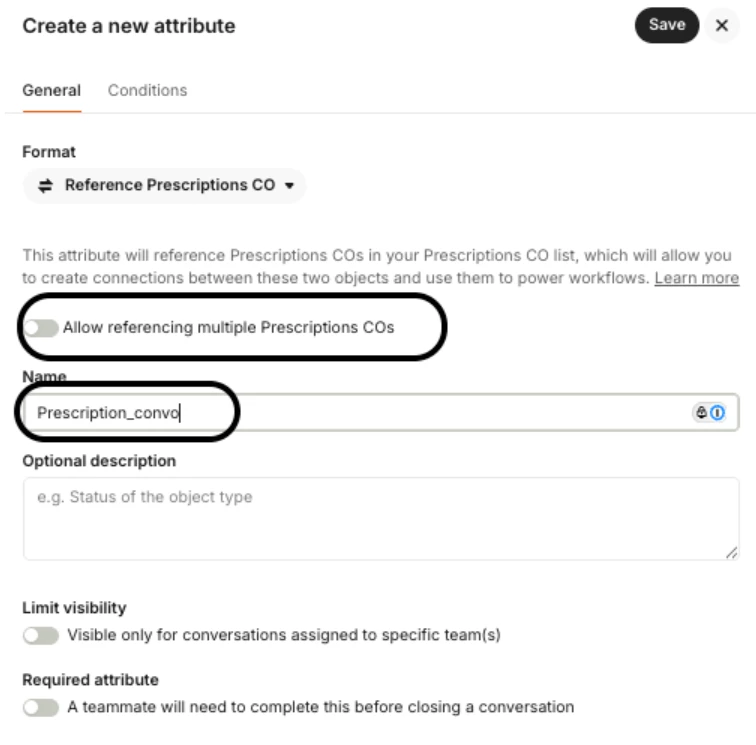
First, we’ll create Conversation Data with the Reference format and select the Prescriptions CO Custom Object for the full inventory we’re displaying.
In this case, we’ll toggle off “Allow referencing multiple Prescriptions CO,” since we only want to reference a single item rather than creating a many-to-many relationship. 👇
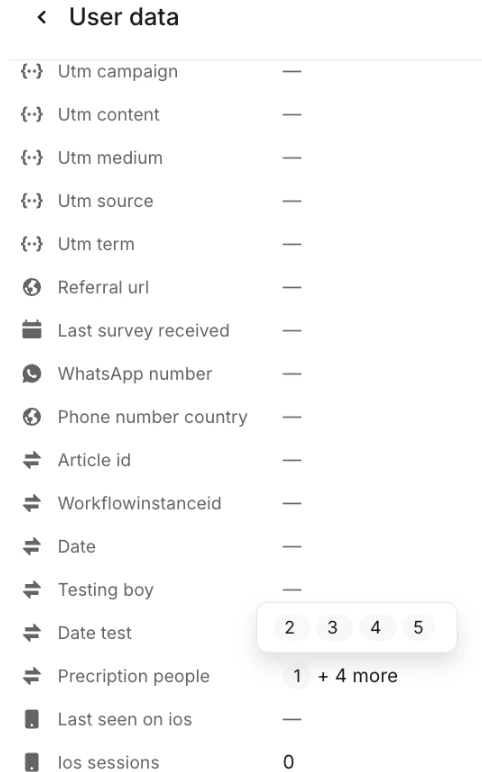
Next, we will create a People Attribute with the Reference format, and once again select the Prescriptions CO Custom Object.
This time, we will toggle on "Allow referencing multiple Prescriptions COs," since we want to create a many-to-many relationship to permanently store all of the user's prescription data on their profile. 👇
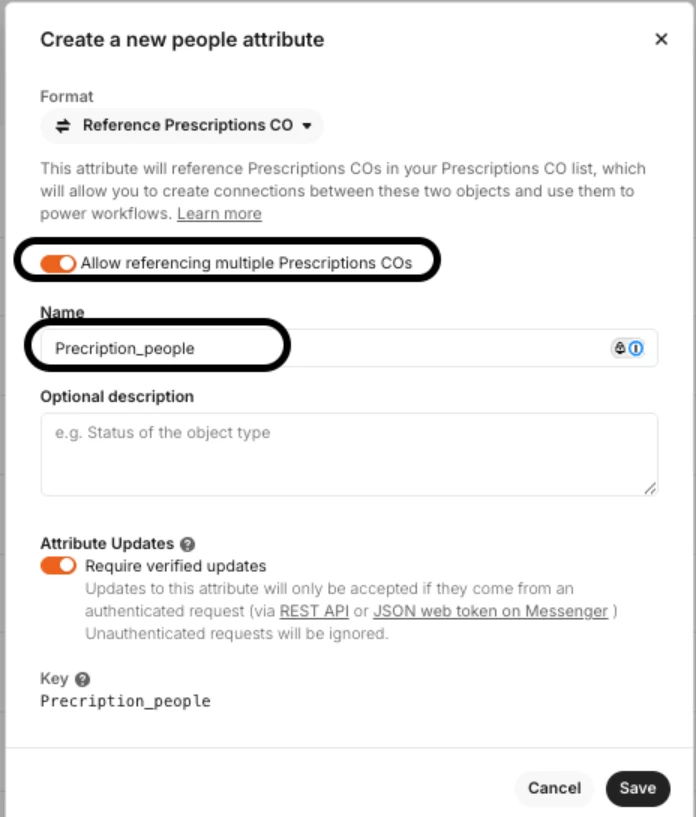
Once done, we can go ahead and Save everything.
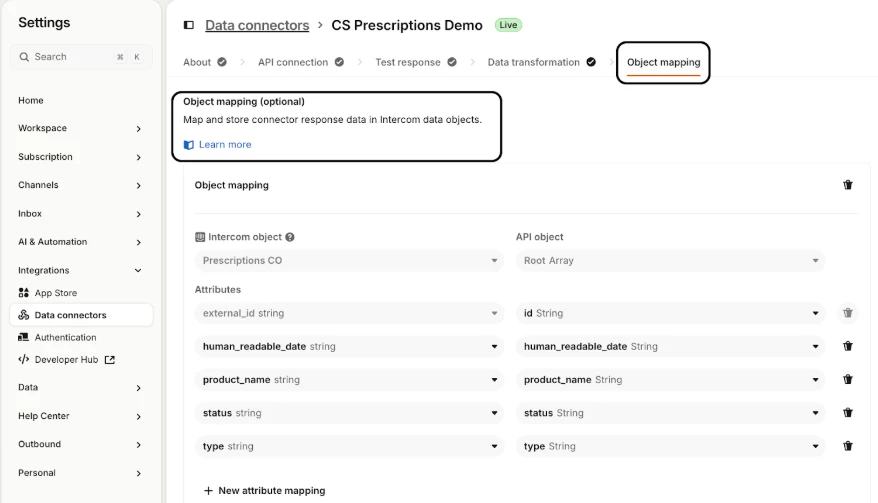
Now let’s move on to the Object Mapping step in the Data Connector. ⬇️
First we map the Intercom Object of the Prescription CO to the API object that’s returned, in this case it’s an Array of Products.
Then we match each attribute that we have created in the Custom Object to a matching attribute from the API response. Once done, we select the reference from either People or Conversations to the Prescriptions CO.
Here is what it should look like 👇
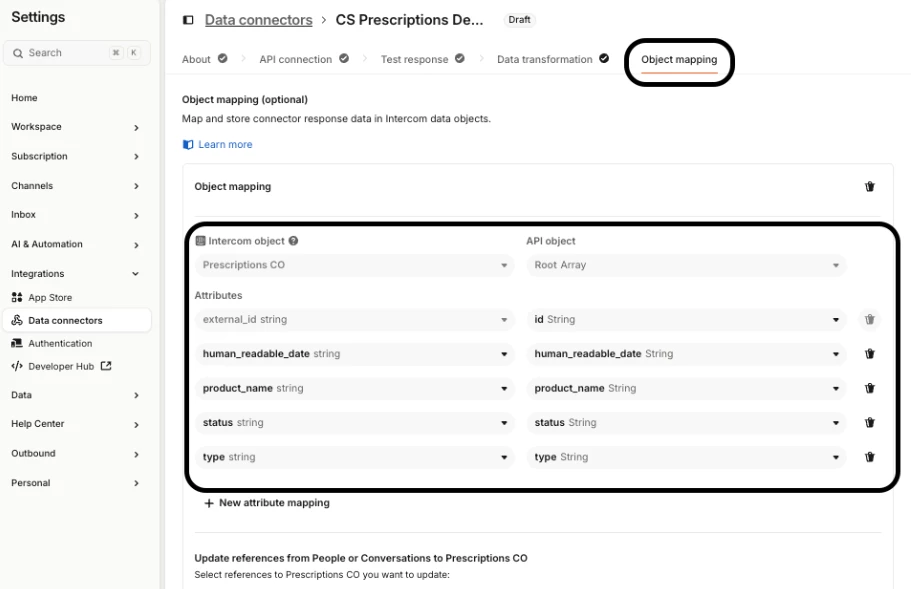
Make sure Update references from People or Conversations to Prescriptions CO should show People > Prescription_people 👇

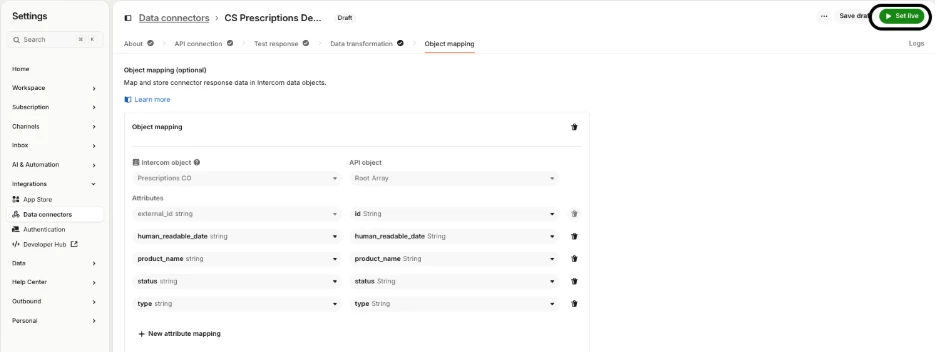
Set live 🎉
Now let’s put it all together in a workflow so your bot can fetch and display each user’s prescriptions dynamically.
Here’s what my workflow looks like and how to add the Data Connector👇
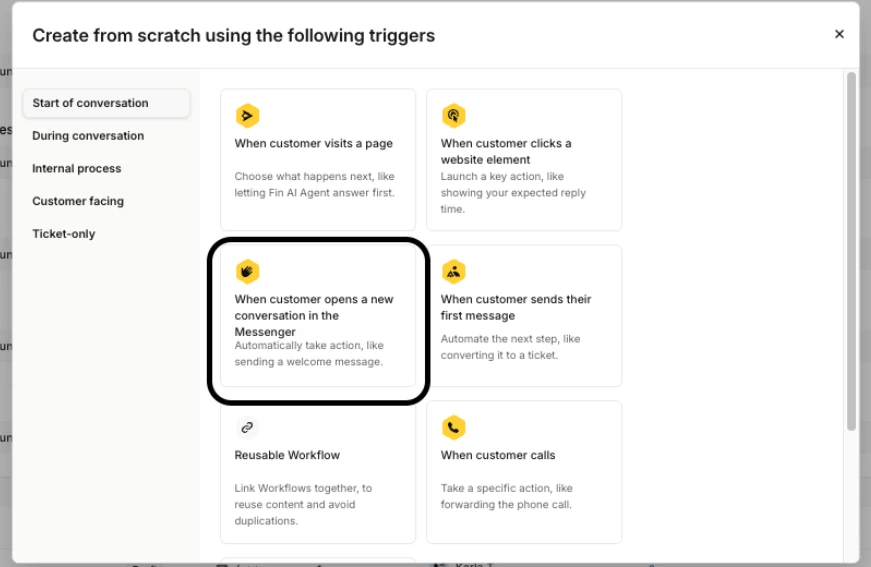
Go to Fin AI Agent > Workflows > New Workflow
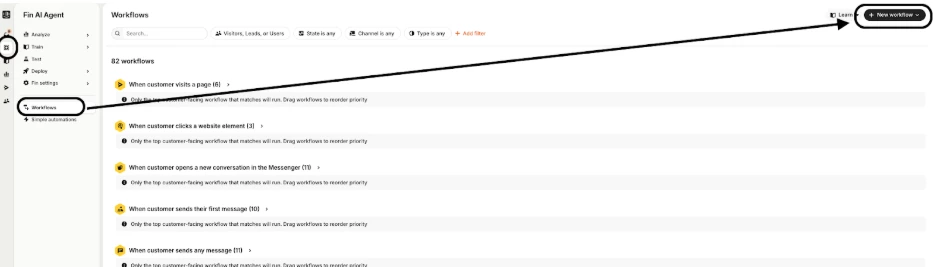
Create from scratch

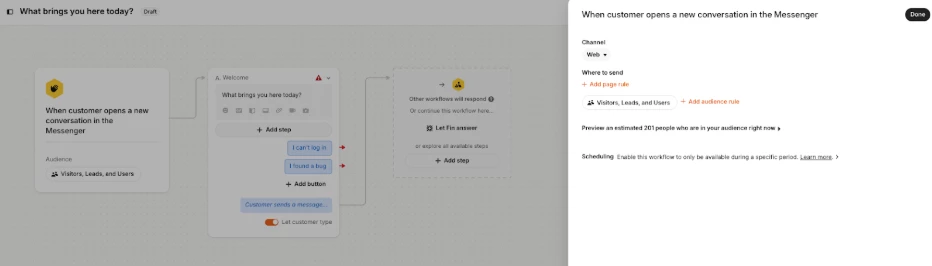
Use When customer opens a new conversation in Messenger trigger ⬇️
Add trigger settings
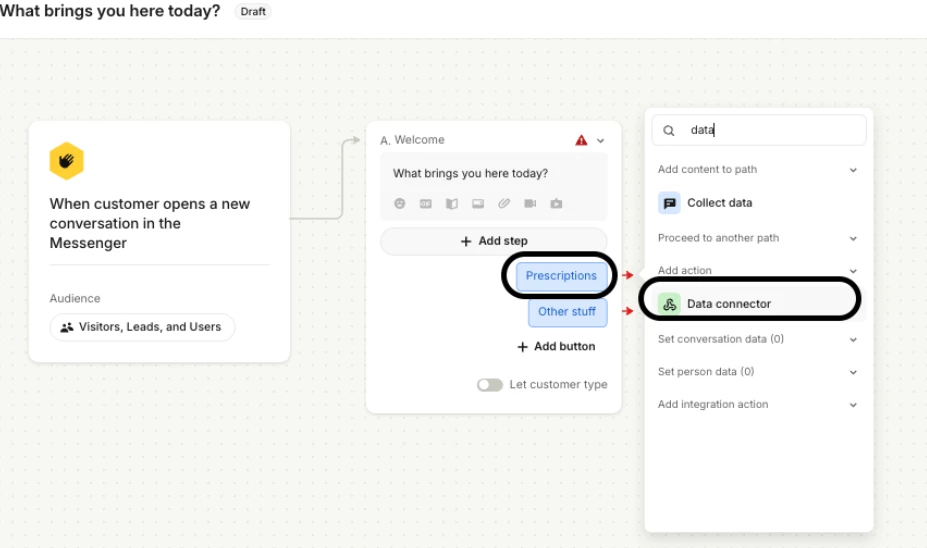
After trigger settings are set, you will rename the buttons in Path A. In this example, I have named my buttons Prescriptions and Other Stuff
Once the buttons are labeled, click on Select Data Connector > CS Prescriptions Demo

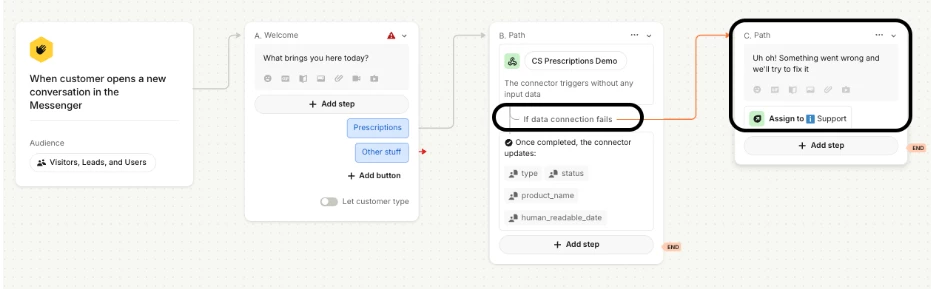
Once done, add the error message for if the Data connector fails (e.g., “Uh-oh, something went wrong!”) and assign the conversation to your support team 👇
Add a message “Which prescription are you writing about today?”
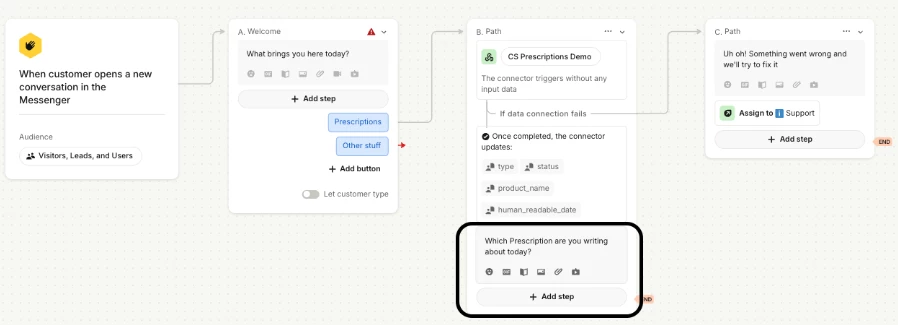
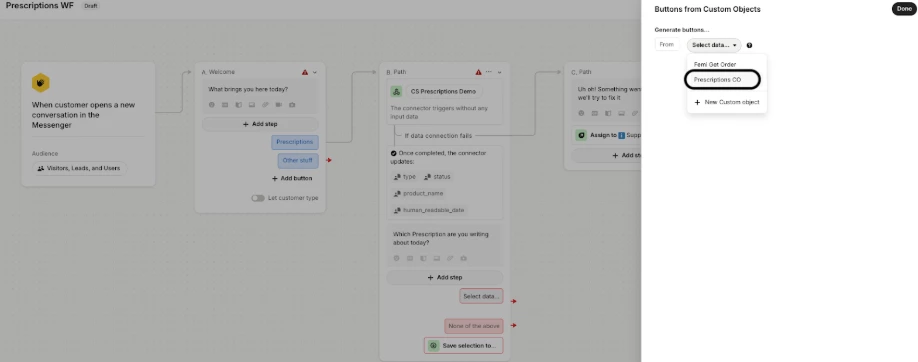
Then add the Buttons from Custom Objects under the message block

Click on Select data > Prescriptions CO
Click on Add condition to select the "People > Prescription_people for Person from context” option 👇
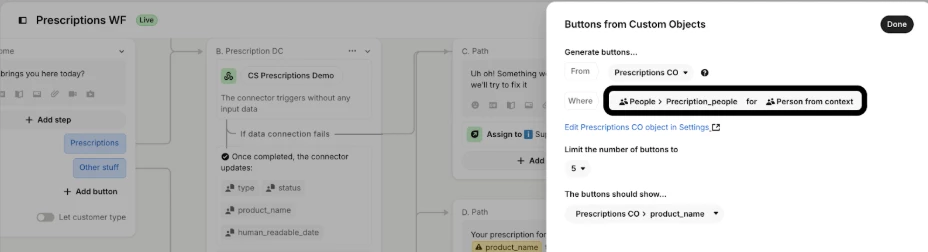
We choose this option because it’s the field we mapped the data to when configuring the Custom Object and People attributes.
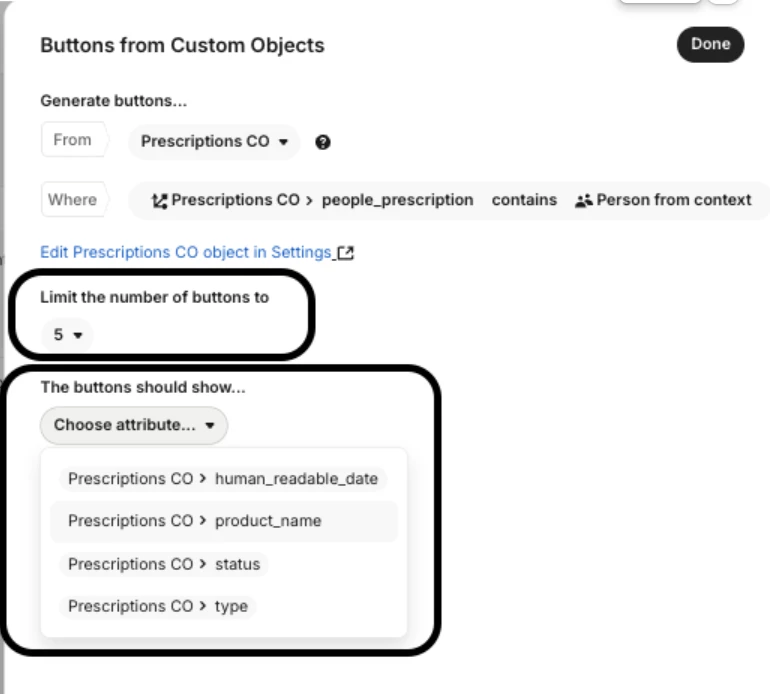
Next, select how many prescription buttons to display and which attribute each button should present 👇
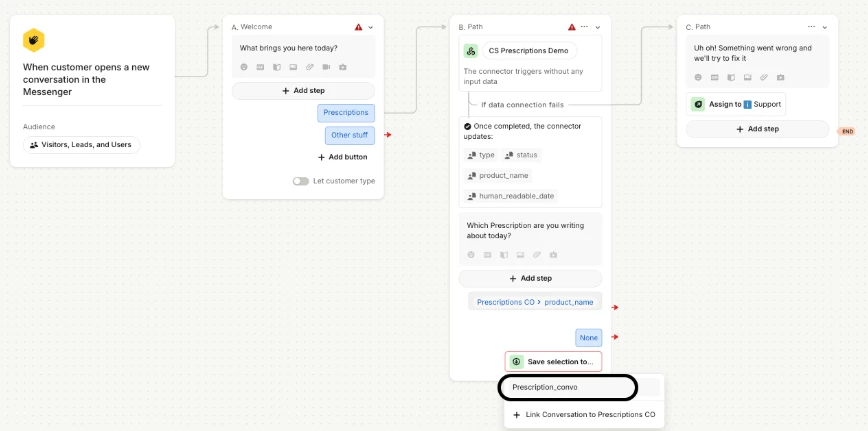
Once you’ve set everything up, hit save and close. Then pick None, unless you want this button to branch into another path, in which case you can link it there instead.
Click on Save selection to > Prescription_convo
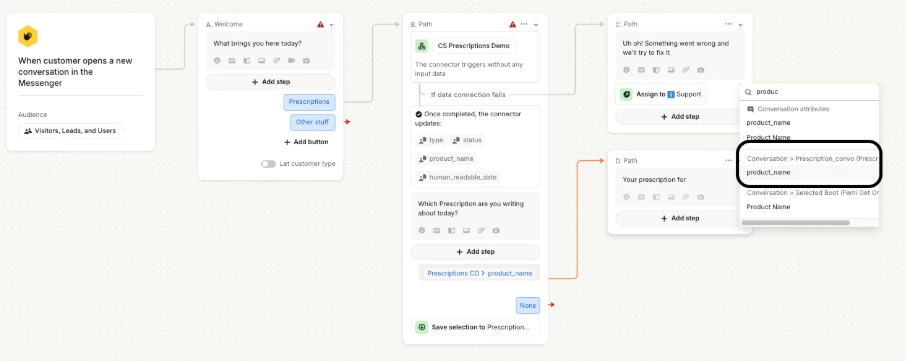
You can click on the {..} to select the attributes and the scroll down the list until you get the Conversation > Selected Prescription (Prescription CO) options and structure the message however you want it

Select product_name under Conversation > Prescription_convo 👇
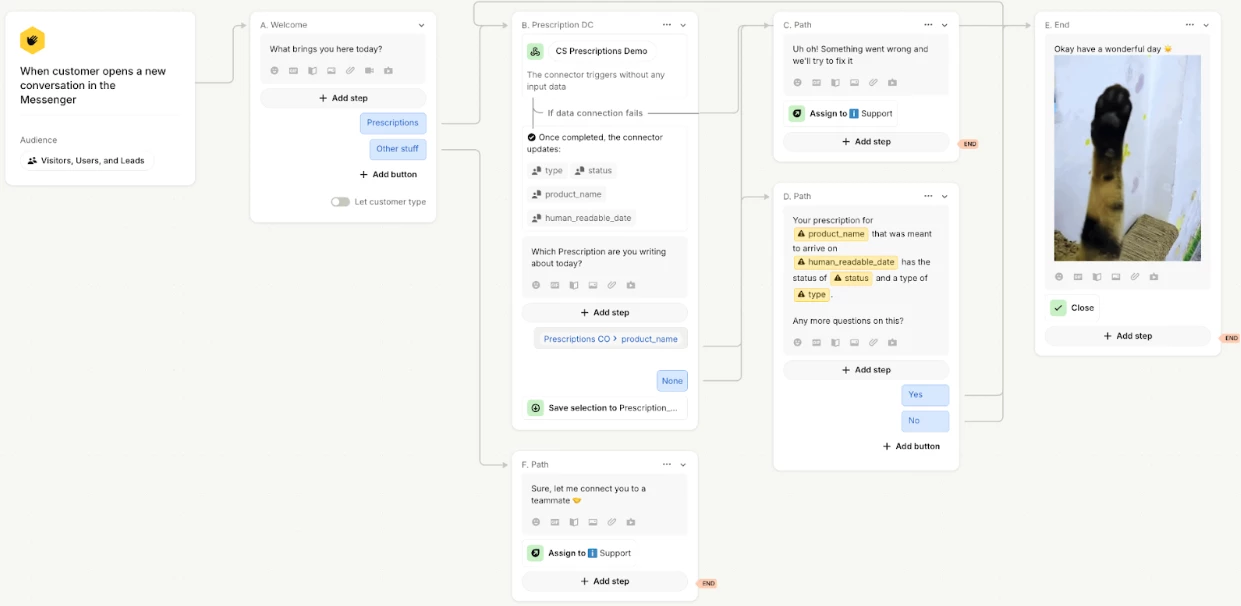
You will repeat the steps, for it to look like this 👇

Here is the full workflow ⬇️
Run a quick test of your workflow on a live messenger not the preview section 👩🏻🔬
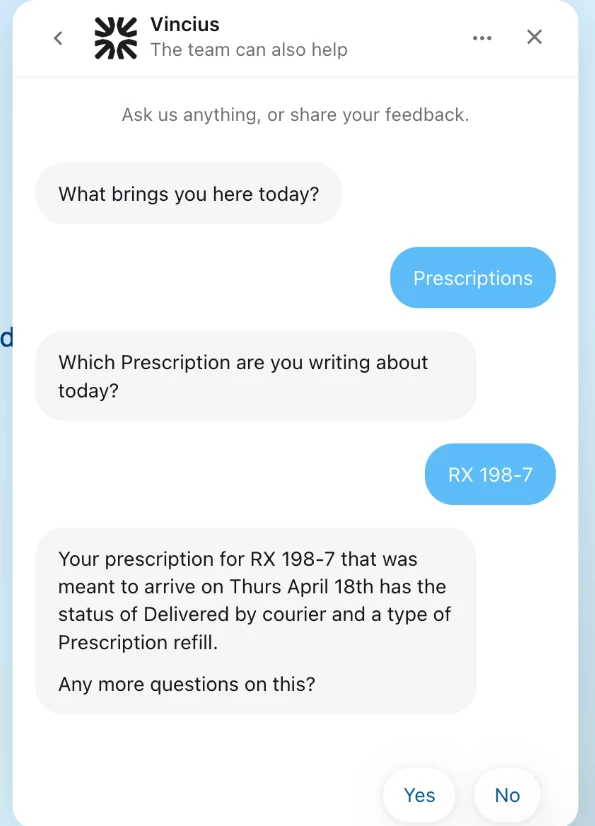

You’ll see the list of prescriptions appear dynamically based on the user’s People data.
When you select one, your bot will pull the exact details from your Custom Object and display them instantly.
If you add a new prescription to your API, it’ll automatically appear in the list the next time that user interacts with the bot. No extra setup needed!
And there you have it, a complete, People Data–powered workflow that fetches real-time user information right into Messenger.
This setup ensures your data sticks with your users, not just their conversations, letting you build smarter, more personalized experiences.
Give it a try, and see how you can adapt this flow for your own use cases — loyalty programs, order tracking, or anything else that grows with your users over time. 🚀