


Currently when you add the “Notify Slack Channel” action to a Workflow step, it doesn’t allow you to customize the notification which isn’t to great when you want to send a specific message or include data pertinent to the user. Well... with the use a Data Connector, you can create your own custom Slack notification!
1. Set Up a Webhook in Slack
First, create an incoming webhook in Slack:
- Go to your Slack workspace and click on your workspace name
- Select "Settings & administration" → "Manage apps"
- Search for "Incoming WebHooks" and click "Add to Slack"
- Select the channel where you want messages to appear
- Click "Add Incoming WebHooks integration"
- Copy the Webhook URL (you'll need this later)
- Optionally customize the name and icon for your webhook
2. Create the Data Connector in Intercom
Now set up the connector in Intercom:
- In Intercom, go to "Settings" → "Data Connectors"
- Click "Create new data connector"
- Choose "Custom" as the connector type
- Name your connector (e.g., "Slack Notification Connector")
- Select "POST" as the HTTP method
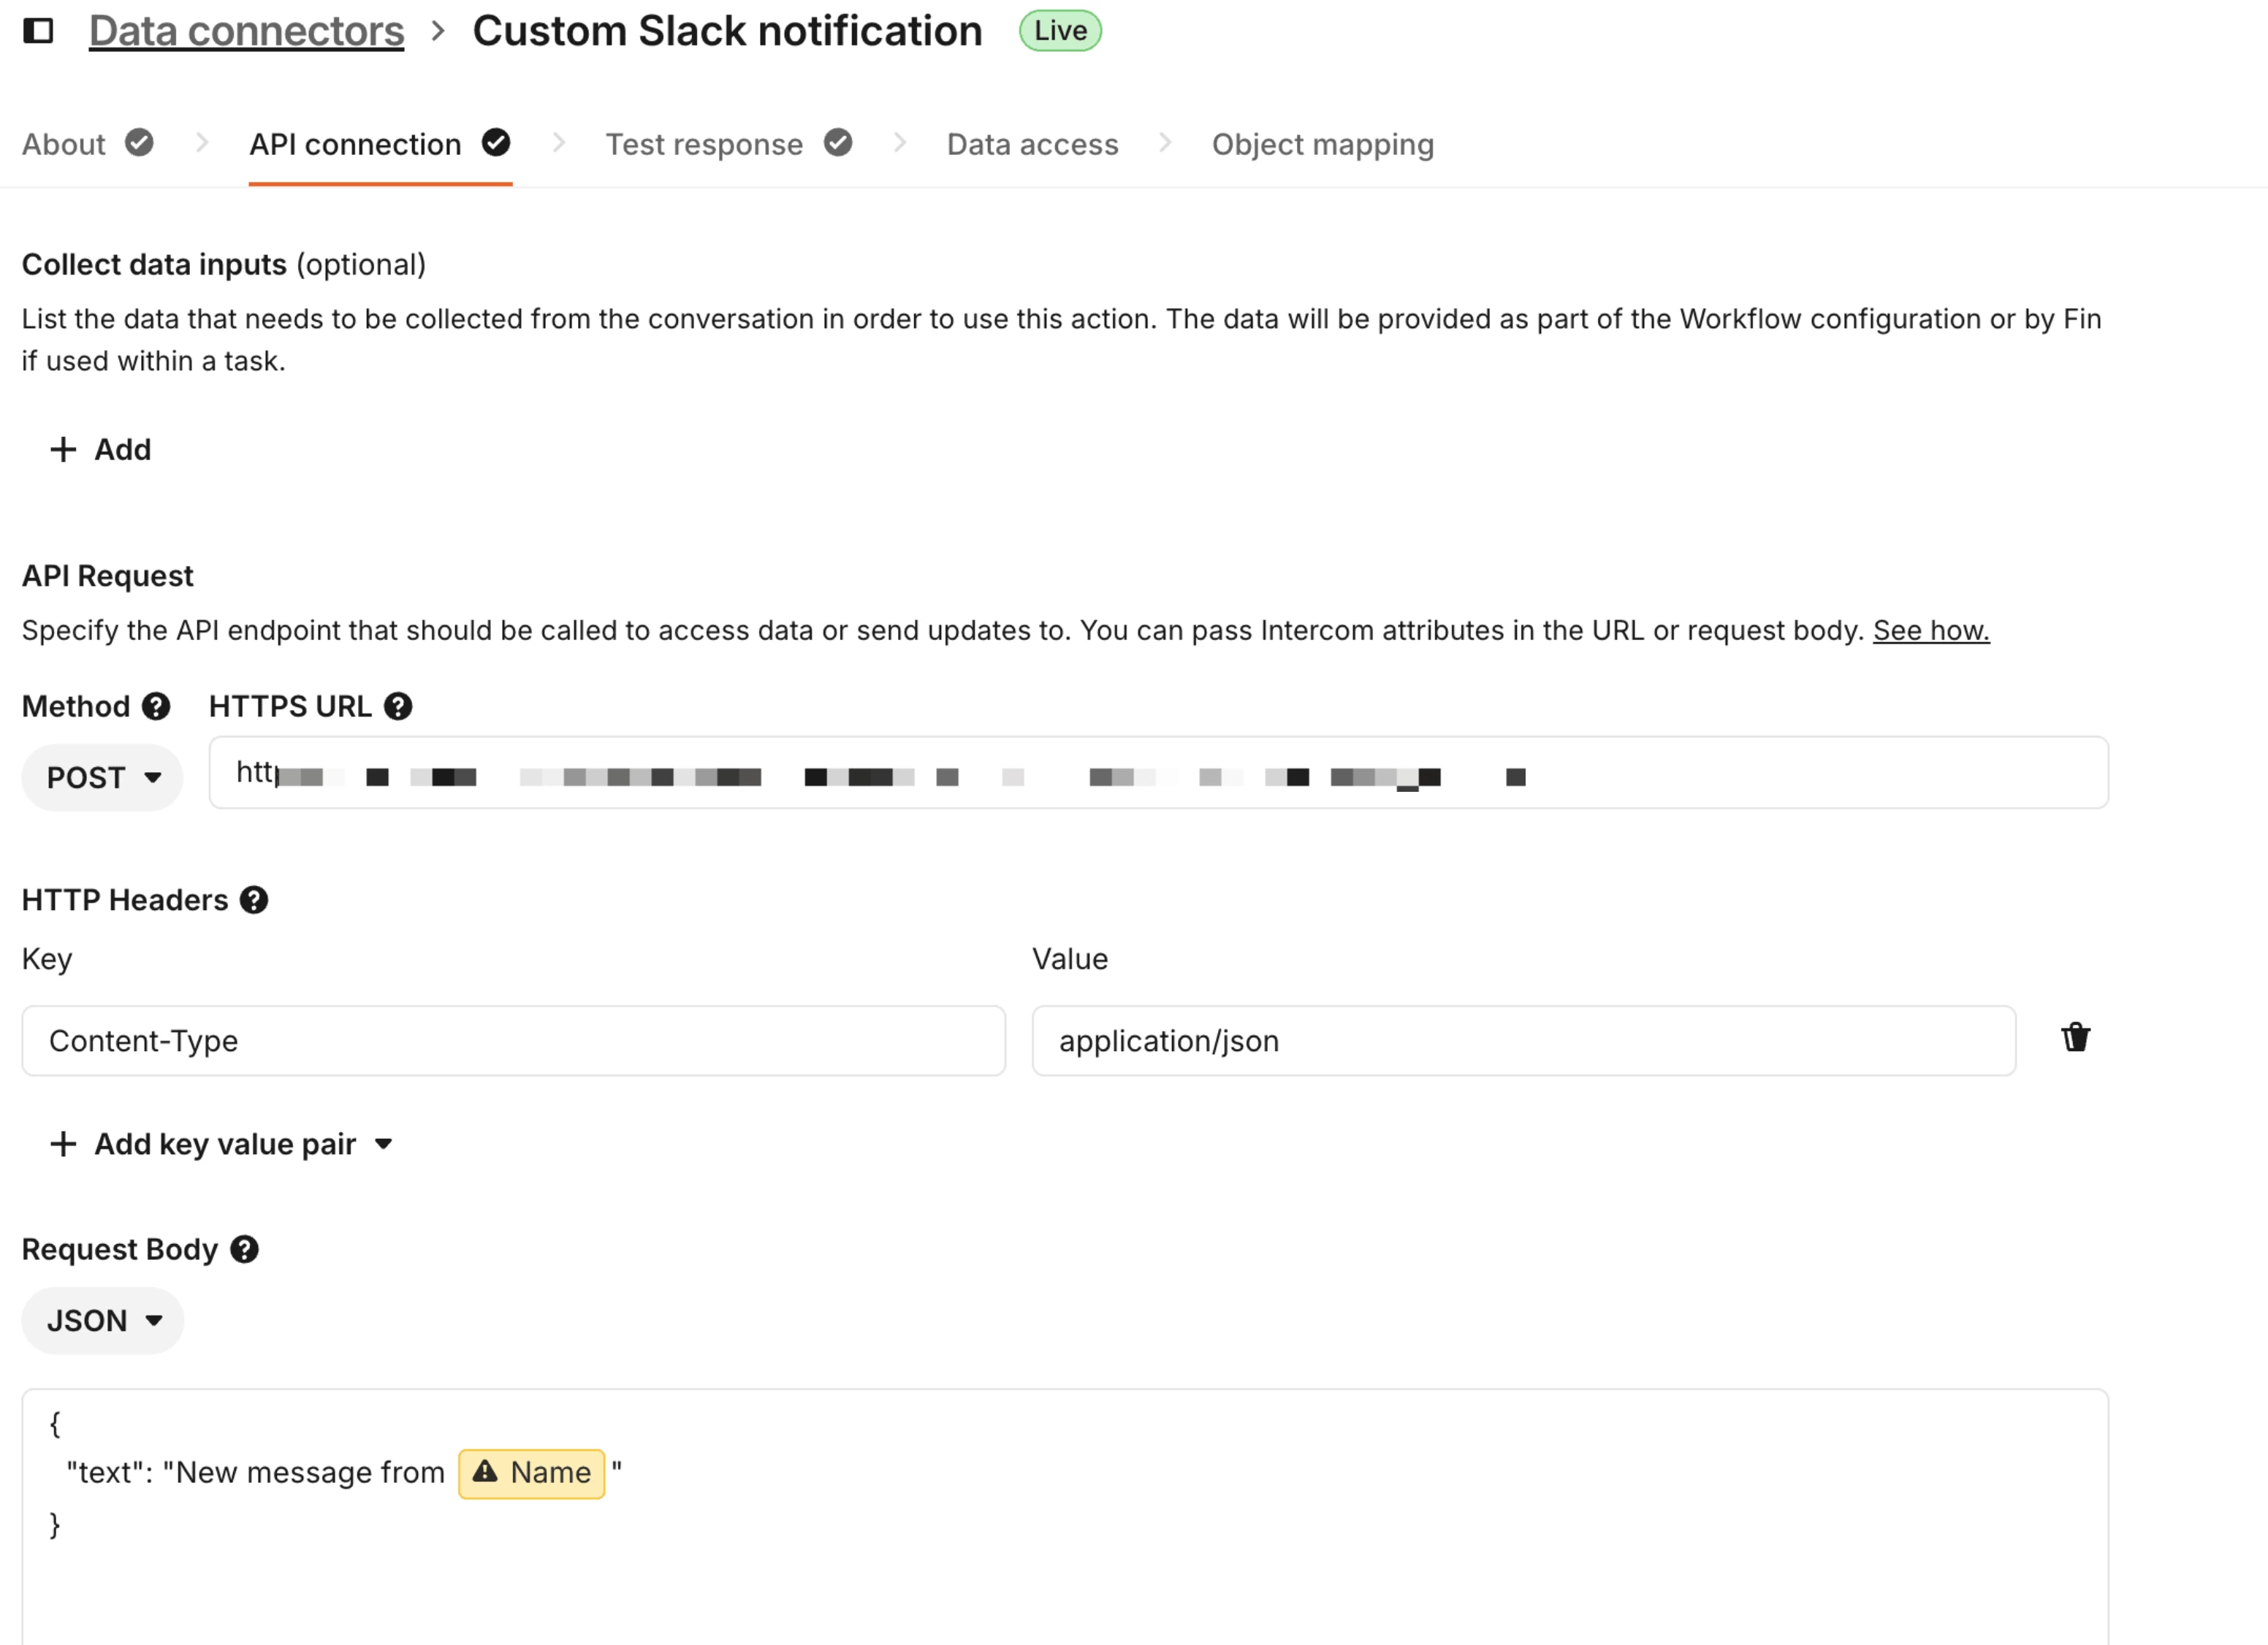
3. Configure the Connector Settings
Fill in the connector details:
- In the URL field, paste the Slack webhook URL you copied earlier
- For "Authentication", select "None" (Slack webhook URLs contain their own authentication)
- Under "Headers", add a header with:
- Key: Content-Type
- Value: application/json
4. Set Up the Request Body
Create the JSON payload for Slack:
- In the "Body" field, add JSON like this:
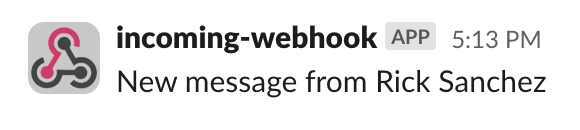
{ "text": "New message from {{name}}"}Customize this message to suit your use case.
5. Test and Activate
- Click "Test" to send a test message to your Slack channel
- If successful, click "Save" to activate your connector
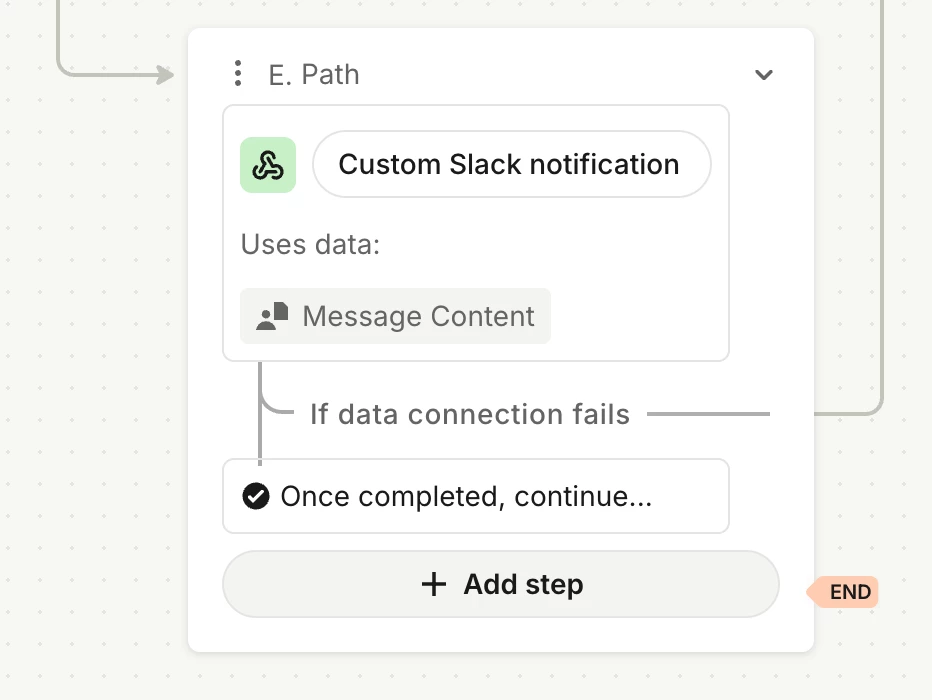
6. Add the Data Connector to your workflow
That’s it! 🎉
