


Have you ever found yourself pounding your head against the wall trying to figure out a simple way for your team to delete a single Conversation in Intercom? For a long time the only way to delete a conversation was by deleting the Intercom User or Lead associated with the Conversation. But by doing this you not only delete that single Conversation, you also delete that User/Lead and every other conversation that is associated with them.
Recently our Engineering team added a ‘Delete a Conversation’ call to the Unstable version of our REST API. This new endpoint allows your team to delete a single conversation from your Intercom workspace without having to delete the associated Intercom Contact!
This is a step in the right direction, but making an API call isn’t always super convenient. Also, those three letters API, can strike fear in the hearts of those customers who don’t have a little bit of coding experience under their belt.
What follows is a solution for deleting a single conversation without ever leaving your Intercom Help Desk. It does require a little bit of set-up, but not much. And the API portion of this solution is minimal.
THE FLOW
A quick Overview of what we’ll do:
- Create a Custom Action in Intercom that makes an API call to that ‘Delete a Conversation’ endpoint.
- Create a Reusable Workflow that calls your new Delete Custom Action.
- Trigger that Reusable Workflow from your Help Desk while the conversation is open in your workspace.
STEP 1: CREATE A CUSTOM ACTION
If you haven’t already created a Custom Action in Intercom, I would recommend reading up on them in our article, here, in order to get a better understanding of what they are.
- In your workspace go to your Custom Action menu and click on the Create action button in the top-right corner
- Name your Custom Action and provide it a description so it’s clear to the rest of your team what the action is designed to do.
- In the Request section you’ll set up your API call
- Open these Dev Hub docs if you want to see where I’m getting the instructions for making this API call.
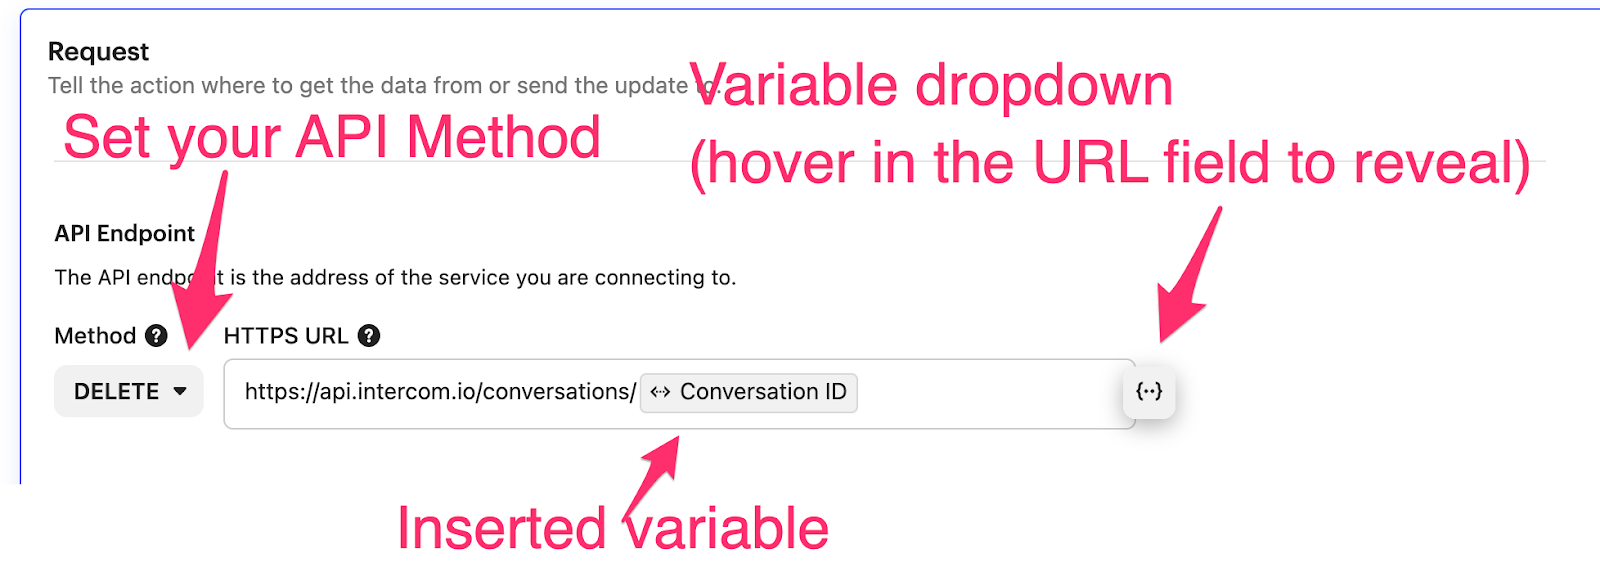
- Set the ‘Method’ to DELETE
- In the ‘HTTPS URL’ field add https://api.intercom.io/conversations/{id}
- That {id} portion of that URL represents the id of the conversation that you want to delete. This will change depending on the conversation that you’re deleting, so you’ll want to insert a variable here that represents that id.
- Delete that ‘{id}’ text from the URL and replace it with the Conversation ID variable. You can find that variable by clicking on the {..} that appears when you hover over the URL field.
- Clicking that {..} icon will reveal a dropdown menu. Scroll down to the Conversation Attributes section of that dropdown and choose the Conversation ID attribute. This should insert that Conversation ID variable into the URL so it looks like this
- Set up your API call’s Headers
- If you haven’t already, you’ll need to create an app in the Developer Hub for your workspace. When you do this, it will create an Authentication Token that you can use to make API calls to your workspace. You can read up on how to do that by following along with Steps 1 and 2 in our Developer Hub docs here.
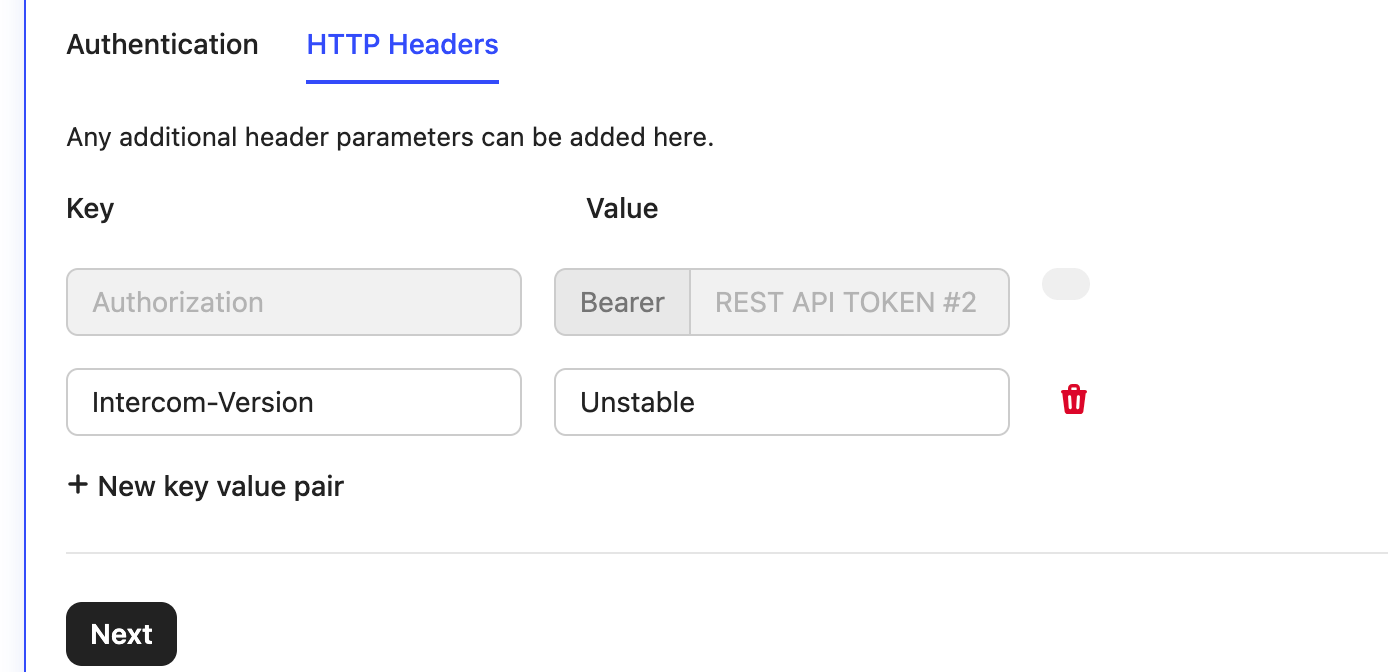
- Add an Authorization Header with the value of your new app’s Bearer token. If that token’s value is ‘abc123’ then you will add Bearer abc123 as the value for that token. NOTE: You should keep these token values secret. I would recommend creating a variable for your token as instructed here and then referencing that variable in your custom action under the Authentication tab. This will also save you time when creating future Custom Actions.
- Add a second Header with the key name of Intercom-Version and a value of Unstable.
- It should look like this when you’re done. I’m using a variable for my Authorization Header so yours might look slightly different than mine.
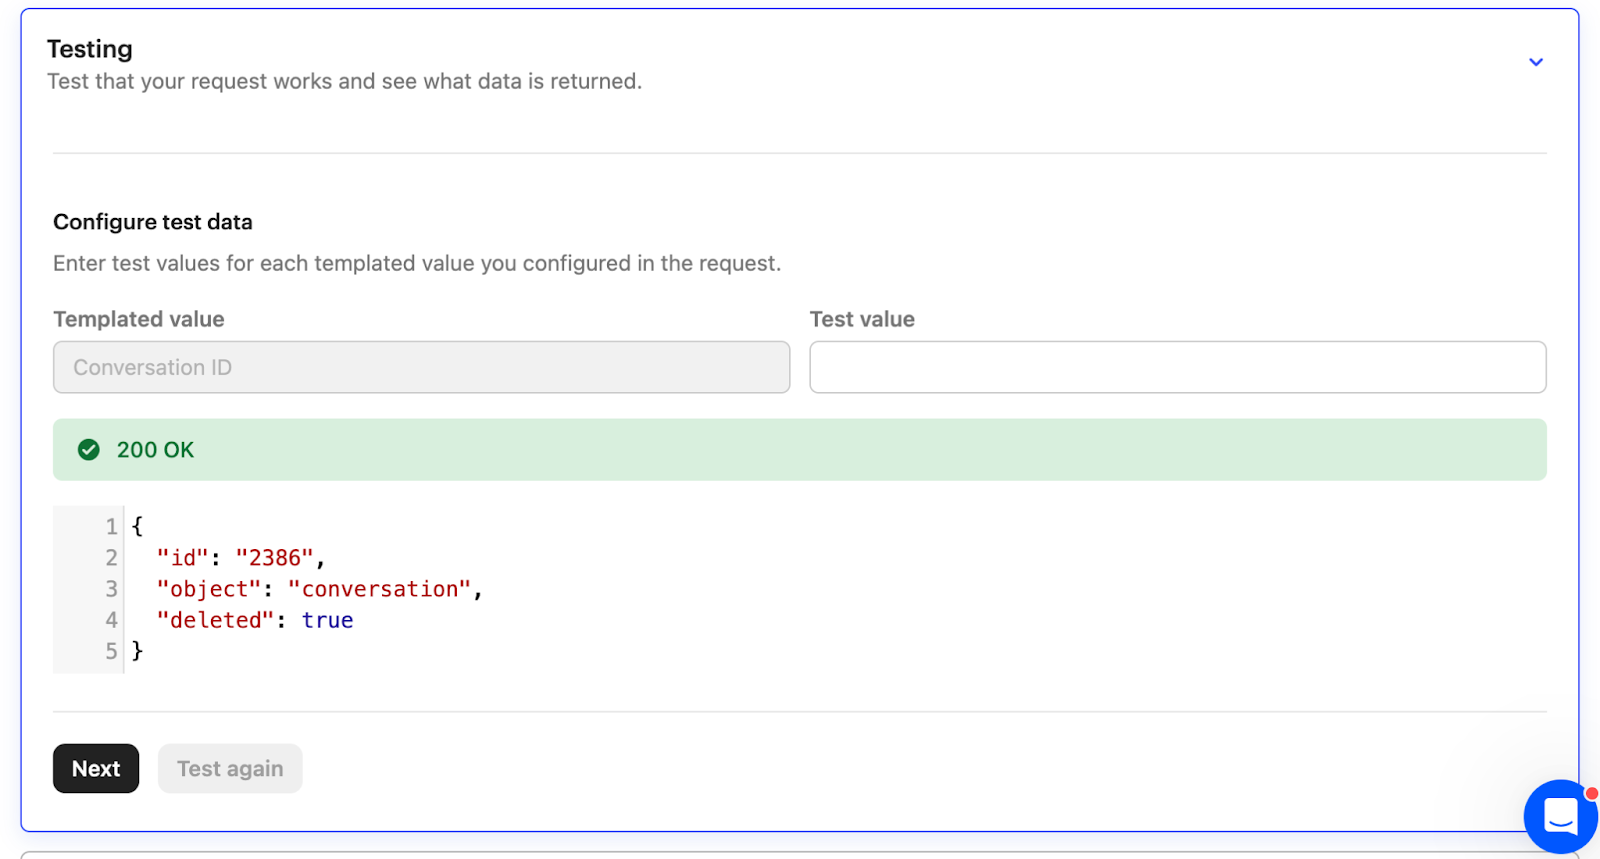
- Finally, you’ll want to Test this call in the Testing section.
- Click on the Testing tab to open it.
- You will see a Templated Value field that says Conversation ID and an empty Test Value field to the right of that. Insert a Conversation ID of an actual conversation from your workspace here. An easy way to find a Conversation’s ID is to open a Conversation in your Help Desk and look at the URL in the browser bar. It will look like this (those with EU or AU data hosting will see a slightly different URL): https://app.intercom.com/a/inbox/abdefg/inbox/shared/all/conversation/238 that number after ‘conversation/’ is the Conversation ID
- Find a conversation that you are okay with deleting and copy that ID value and paste it into that Test Value field. Even though this is a test, the conversation WILL actually delete. So you don’t want to use any conversation for your testing that you aren’t okay with deleting!!
- To test the delete call on this conversation, click on the ‘Test’ button.
- If it works, you should get a ‘200 OK’ response along with a response object like the one below. You will also no longer be able to open that conversation in your workspace.
Congrats! That was the hardest part of this process. It should be a breeze from here.
STEP 2: CREATE A REUSABLE WORKFLOW
- Go to your Workflows menu and click on the New workflow button in the top right corner of the screen.
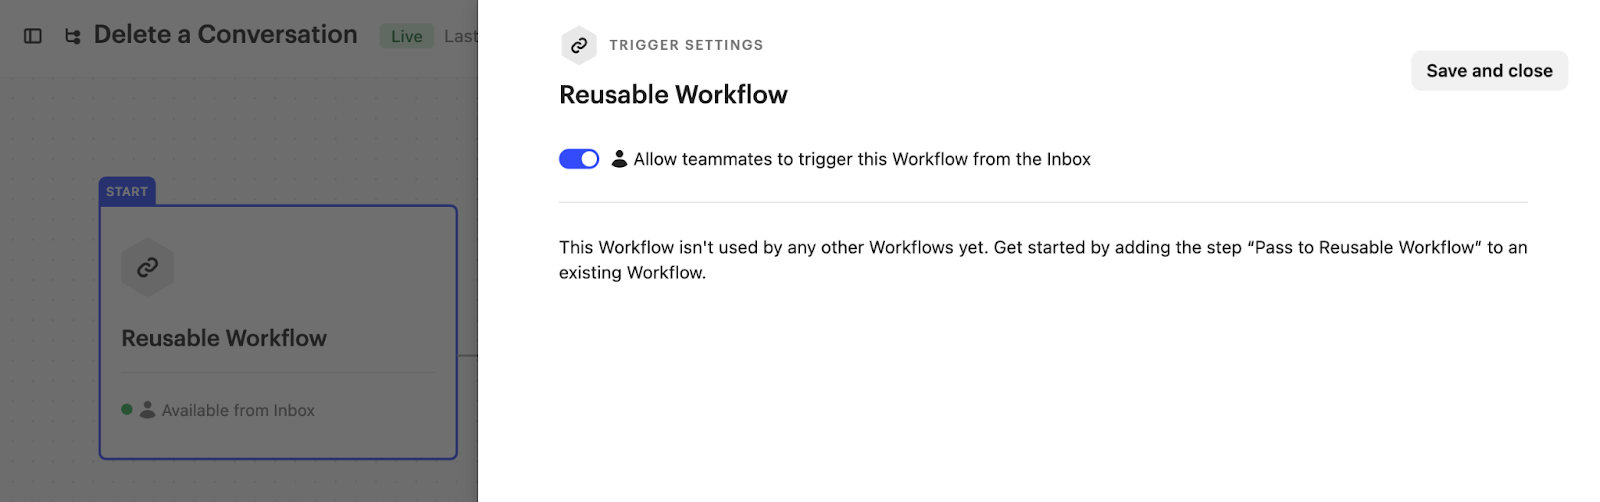
- Choose to create a Reusable Workflow from the selection of Workflow triggers.
- Click on the first box of the Workflow (it says ‘Reusable Workflow’) and toggle on the Allow teammates to trigger this Workflow from the Inbox feature.
- Add your Custom Action to the path of your new Workflow.
- In the ‘If the Action Fails’ path, I like to add a note that lets the admin know that the action failed, just so it’s clear to them.
- It will look like this when you’re done

STEP 3: CALL THE WORKFLOW FROM THE CONVERSATION
- In your workspace’s Help Desk, open a conversation that you want to delete.
- Open up the shortcuts dialog box by pressing command-k.
- Choose the Trigger Reusable Workflows option and select your new Workflow.

- If your workflow runs successfully, it will delete your conversation! If you try to reload that conversation now, it will no longer load. If the call fails for some reason, the fail Note from your Workflow will get added to the conversation to let you know.
Your team can now easily delete a conversation from your Help Desk by triggering a Reusable Workflow. There isn’t currently a way to limit which admin can use a Reusable Workflow so you’ll want to make sure that your team fully understands the power of it before they indiscriminately trigger it in a conversation.
I hope this is helpful for those customers who are looking for a more painless way to delete a single conversation!
If you’ve come up with any other clever ways of making use of Custom Actions or Reusable Workflows be sure to share them with the Community in the User Tips section!

